Why matching everything to the beard can go wrong
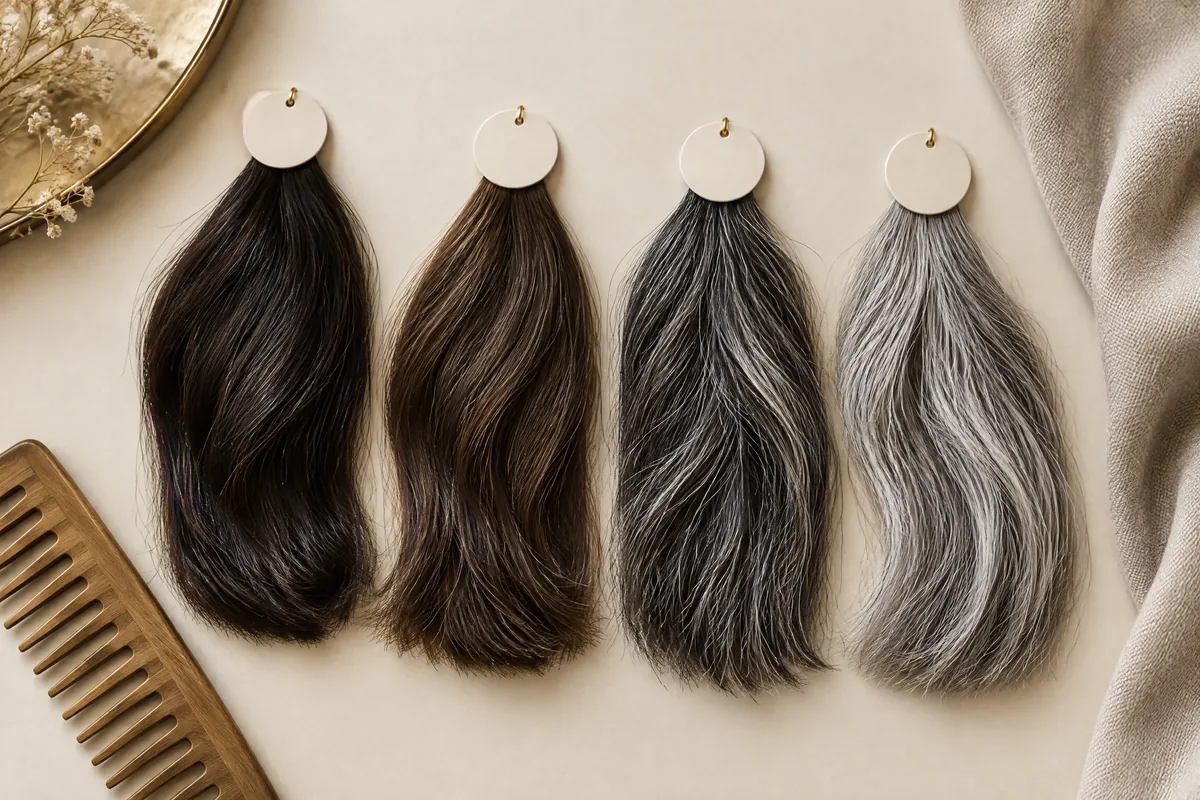
A full beard can look almost black from across a room while revealing brown or reddish strands up close. Your temples may look softer because they contain grey or have shorter, less densely overlapping hair. Choosing the darkest sample beside the beard can therefore create a heavy front that looks disconnected from the sides.
The aim is not three identical blocks of colour. It is a believable relationship between the hair above your forehead, the hair around your ears and the facial hair below. For a partial front piece, the most demanding comparison is usually the boundary where the added hair meets your own temple hair.
OWNSTRAND's guide to a men's hair system for receding hairline distinguishes a front-focused request from broader coverage. That distinction matters for colour: a small frontal piece may sit beside your own sides, whereas a larger option can change more of the hairstyle. Sketch the area you want covered before narrowing the samples.
Separate depth from warm or cool tone
Depth describes how light or dark a shade is; tone describes its hue and warmth or coolness. Wella explains these as separate characteristics and notes that colour brands have their own level-numbering systems. A wig supplier's shade code therefore needs its own sample, rather than a guessed conversion from a hair-dye chart. 1
In practical terms, compare two things in sequence. First ask whether the front sample is visibly darker than the temples. Then ask whether it looks more red-brown, golden, neutral or cool beside them. Two samples can be similarly dark yet give very different impressions when placed next to your own hair.
Judge darkness without using shine as the answer
Hold the sample so its strands fall in a similar direction to the temple hair. Examine the body of the colour, not just the brightest reflection. Rotate it gently and compare again. If the front only looks lighter when it catches a strong highlight, that does not necessarily mean its underlying depth matches.
Do not decide from a tightly bundled colour swatch alone. Ask to see the hair spread as well as gathered, where possible. A bundle answers a colour question; hair positioned near your forehead adds questions about overlap, density and shape. A dark-looking front may need a styling discussion rather than a lighter shade.
Judge tone before choosing a darker replacement
Suppose a brown-black sample looks reddish beside cool-looking temples. Replacing it with the deepest black may hide some warmth but introduce a depth mismatch. Compare an alternative at a similar depth with a more neutral or cooler tone first. Equally, a blue-black impression can feel disconnected from visibly warm brown sides.
Describe the difference in ordinary words rather than requesting an ash dye formula. Wella's tone vocabulary helps explain what you see, but it is not permission to recolour a hairpiece. Shade names are starting points; the exact fibre, existing colour treatment and maker's instructions determine what changes, if any, are appropriate. 1
Set up a useful light comparison
Start beside a window with diffuse daylight, out of direct sun, and turn off a nearby warm lamp that would mix light sources. Use a plain grey or white background, keeping brightly coloured clothing away from the sample. This is a practical comparison setting, not a calibrated colour laboratory.
X-Rite's visual-evaluation guidance recommends neutral surroundings, minimising other light, and placing samples side by side. It also advises comparing under the lighting in which the finished product will be seen. Applying those principles at home makes the comparison more consistent, even though a window does not reproduce a controlled light booth. 2
Keep your face and the sample in the same light. Comparing temple hair on the shadowed side of your head with a brightly lit sample can make the front seem misleadingly light. Turn your whole position rather than moving only the swatch towards the window, and look at both temples if their appearance differs.
After the first comparison, repeat it under the room lighting you use most, such as your office or home bathroom. X-Rite explains that colours can match under one light source but not another, a phenomenon called metamerism. A daylight match is therefore a useful first result, not a guarantee in every setting. 2
Take a front and a three-quarter photograph with all three zones visible, without a beauty filter. Keep the photos as notes, not final colour approval. If the screen looks different from what you see in the mirror, return to the physical sample. Do not choose between samples photographed in unrelated rooms.
Build a three-zone hair colour card
Use a small paper card with three rows: proposed front, visible temples and beard. Write separate observations for depth, tone and grey. Add a finish note, such as dry and loose or styled with your usual product. Record what is visible today rather than calling every zone black and losing the differences.
| Zone | Depth and tone to record | Grey and finish note | What the row helps decide |
|---|---|---|---|
| Proposed front sample | Dark brown; neutral beside temples | Little visible grey; loose strands | Whether the sample joins the sides without a dark jump |
| Own temple hair | Slightly lighter; cool-looking brown | Grey concentrated above the ears; dry | Main reference for a partial piece touching this hair |
| Beard and sideburns | Darkest at chin; warmer at cheeks | Grey near jaw; usual grooming finish | Whether the whole face looks balanced without copying the darkest area |
These entries are an illustration, not a prescribed colour combination. Replace them with your observations and note the sample name or code. If the right and left temples differ, divide that row into two notes. The card should preserve a difference you can discuss, not force a single average shade onto everything.
Use the following order when comparing candidates. It keeps a convincing beard match from distracting you from a poor join at the temples. Keep rejected samples identified too, so you can explain whether the problem was darkness, warmth or the shape of the front when positioned.
- Place the candidate beside each visible temple and compare depth.
- Compare warm or cool tone at a similar strand angle.
- Check whether grey at the temples makes a solid front stand out.
- Position the sample near the proposed front and step back.
- Compare the combined front and sides with the beard.
- Repeat under your usual indoor light and record any change.

Decide which sides will remain visible before cutting
With a partial piece, your own temple hair may be part of the finished style. With a full wig, the visible sides may belong to the wig instead. These are different haircut briefs. Before suggesting a fade, identify the actual coverage boundary, where your sideburns remain exposed, and which hair will be shortened.
OWNSTRAND's hair system guide treats the term as a category rather than a specification of base, attachment or dimensions. For your colour card, mark the proposed coverage on a simple front-and-side sketch. A front photograph alone cannot show whether the temples are uncovered, partly covered or included within the piece.
For a partial front piece, preserving some temple length may give the stylist more hair to blend into the added front. A very close fade can remove that transition and leave a stronger contrast between a substantial top and exposed skin. Choose it deliberately for its look, rather than treating it as an automatic fix.
For broader coverage, compare men's wigs as full-wig options. Judge the supplied front and side sections together, then check the sideburn-to-beard relationship. Cutting the natural sides shorter will not soften a bulky wig side panel sitting over them; the relevant adjustment may be to the wig's silhouette and fit.
A full wig can give more control over the colour relationship within the head hair, but it adds a whole-head fit and styling decision. A partial piece keeps more of your own hair visible, but its colour must work beside that changing hair. Neither choice removes the need to judge the complete face.
Use the pattern of the mismatch to choose the next step
A useful decision starts with where the mismatch appears. Look closely at the join, then at normal conversation distance. If the sample clashes along the temple boundary, work on colour first. If individual strands seem harmonious but the entire forehead looks heavy, discuss density, direction and outline before rejecting the shade.
| What you notice | Likely question to investigate | Better next comparison | Trade-off to recognise |
|---|---|---|---|
| Front looks darker in both lighting settings | Depth or excessive visual weight | A slightly softer-depth sample and a less solid front arrangement | Too much lightening may clash with darker hair behind |
| Similar darkness, but front looks redder | Tone difference | A similar-depth, more neutral sample | A darker replacement could hide warmth yet create a black block |
| Front works with beard but not temples | Wrong matching reference | Prioritise the exposed temple join | Beard may remain deliberately darker |
| Strands match, but fringe looks solid | Overlap, density or straight outline | Separate the fringe and review a softer direction | Exposing more front requires suitable construction and fit |
| Looks right by window, wrong indoors | Lighting-dependent difference | Recheck candidates under both relevant lights | One sample may be the better compromise, not perfect everywhere |
Imagine cool-looking brown temples, a very dark beard and a dense jet-black sample. The beard comparison alone says yes; the three-zone card reveals the temple mismatch. Try a softer dark sample beside the temples before proposing a dramatic fade. The beard can remain darker if the transition through the sideburns feels coherent.
Now imagine neutral dark temples with grey, a warmer beard and a front sample that matches the temple strands but forms a flat, solid fringe. Simply choosing brown may solve the wrong problem. Discuss a less uniform front arrangement and whether grey blending can be considered for the exact piece, then repeat the overall comparison.
Shape the front and sideburns without hiding the problem
A textured fringe can interrupt the appearance of a single dark band, but texture cannot correct a clear colour mismatch at an exposed join. Ask the stylist to show the proposed direction before committing to a major cut. Review it both resting naturally and arranged as you expect to wear it each morning.
A swept-back style exposes more of the frontal edge, while a forward fringe can cover part of it. The trade-off is not only visual softness: your piece's construction must support the chosen exposure and direction. Do not assume that any mesh description automatically means an exposed hairline will work equally well.
Sideburns deserve their own check. If the temples contain grey and the beard is mostly dark, retaining a graduated visual transition may look more balanced than an abrupt dark rectangle at the ear. Decide where the sideburn should end and how it connects to facial hair before trimming away the available blending length.
Review the colour with dry hair before adding your usual styling finish, then inspect the final arrangement again. Follow the exact hair material's manufacturer instructions for products and heat. Do not apply beard dye, colour shampoo or a hot tool to an unidentified fibre to make a rejected sample seem acceptable.
Bring a precise brief to the sample discussion
Bring the three-zone card, the coverage sketch and an unfiltered photograph showing your normal beard length. State your preferred cut and the differences you want to avoid: for example, a front darker than the temples or a warm-looking sample beside cool sides. This gives the discussion more direction than asking for natural black.
OWNSTRAND offers private sample discussions and head measurement for relevant handmade human-hair wig enquiries, with a return fitting involving washing, cutting and blow-drying after completion. Its sole physical location is Unit 2103, 利寶時中心, 50 Hoi Yuen Road, Kwun Tong, Hong Kong. Discuss visit arrangements and the particular option before travelling.
Ask which colour, grey proportion and front shape can be considered for your enquiry, and what styling is included. Sample viewing does not establish that every frontal design can be made, and a general hair-system discussion does not confirm attachment installation. Keep the colour decision tied to the item you would actually receive.
For a Canvas styling enquiry, contact +852 5443 7168 and describe the coverage, temple colour and beard finish you want to coordinate. Keep the three-zone card as your reference at the final styling stage. The strongest result is not necessarily the darkest front; it is the one that works with the hair that remains visible.
Questions & answers
Should I grow my beard before a colour discussion?
Wear it close to the length you intend to maintain. If you alternate between stubble and a longer beard, bring photographs of both and explain which look matters most. A sample chosen around a temporary beard style may be less useful for your everyday appearance.
What if I cannot describe whether my temples look warm or cool?
Bring two labelled samples into the same light and ask which looks redder, browner or more blue-black beside your temples. You do not need technical vocabulary. Have another person help describe the visible difference rather than guessing from a shade name.
Is a printed three-zone card a substitute for hair samples?
No. The card records observations and the sample identity; printed colour blocks cannot reproduce the appearance of strands. Keep the actual sample comparison central, and use the notes to avoid forgetting why you preferred one option over another.
Should the moustache have a separate colour entry?
Add one if it looks clearly different from the chin or cheek hair, especially with a prominent moustache style. The three-zone format is a starting point. Recording that extra difference is more useful than describing a varied beard as one uniform colour.
When should I update the colour card after buying a piece?
Revisit it before a replacement or major haircut, and when your visible temples or facial-hair colour changes noticeably. Compare the maintained piece with your present hair rather than automatically repeating an old shade code that once worked.
Put the next step into practice
Build a clearer understanding of hair shape and everyday styling through learning at Canvas. Hair styling courses in Hong Kong。
Explore more practical styling and selection notes. Canvas hair and beauty journal。
Tell the team which hair styling techniques you would like to learn. Contact Canvas Academy。
Sources & further reading
- Wella: Want to achieve your dream shade? Hair levels and tones can help
Explains why lightness or darkness and warm or cool tone should be compared separately, and why shade-number systems are brand-specific.
- X-Rite: 10 Tips for Visually Evaluating Color
Shows how surroundings, sample placement and different light sources affect colour comparisons, including matches that change under another light.