Find the part of your outline you actually want to change
Look at your hair from the front, then turn sideways. If the back already feels right but the front looks too uniform, you may want a local change around the forehead or cheeks. If you want a different shape above the ears and behind the head, changing only the fringe will not address that wider preference.
A useful distinction is the number of areas you are changing, not the amount of hair on the floor. A short front section can make a striking difference in photographs. Shorter upper layers can alter the relationship between the top and the long back, even when the longest ends remain in their original place.
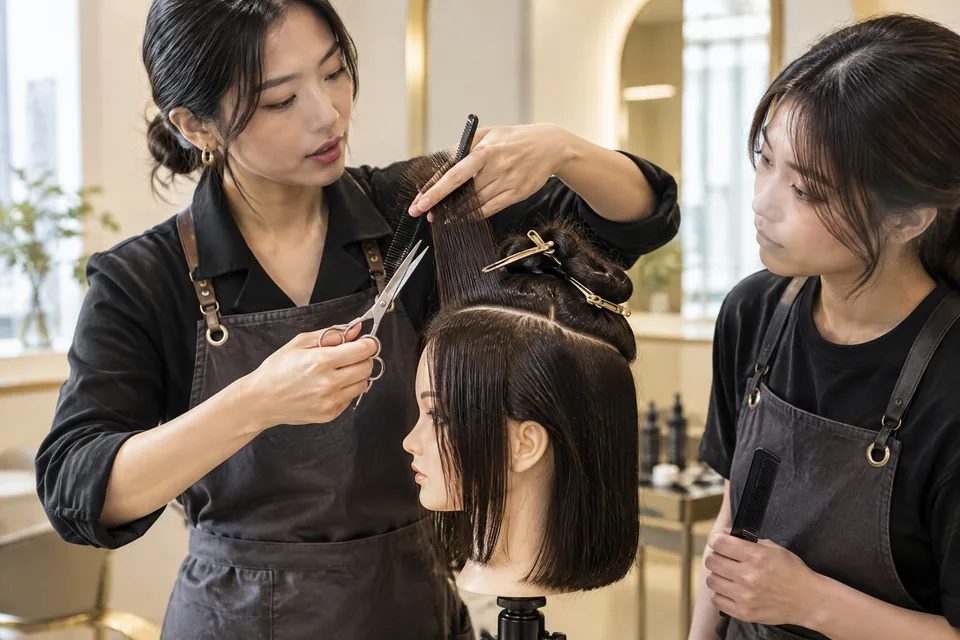
Professional cutting education illustrates why these areas deserve separate decisions. Sam Villa's midlength layering tutorial handles the fringe, face frame, upper sections and perimeter separately, protecting the perimeter during the layered work. That is one design example, not a technique every haircut must follow. It shows why keeping the longest strand is only part of keeping a familiar outline.1
Start with a sentence you can test in a mirror: “I want more shape beside my cheeks, but I still like the back.” Or try: “I want visible shorter pieces above a longer back, but not a thinner-looking bottom edge.” Each sentence identifies a different change, without locking you into a hairstyle name.
Build a change budget around three daily choices
Your change budget is the amount of difference you are happy to live with, not the appointment price. Give three things a clear boundary: forehead coverage, hair that must tuck or tie away, and tools you genuinely use. These limits can point in different directions. A dramatic photograph is not automatically a high-maintenance choice, and a subtle front change is not automatically effortless.
Write your preferred answer for each column before selecting a row. Treat the table as a discussion aid rather than a score. You might combine an open forehead with strong layers, or fuller front coverage with a largely unchanged back. The useful plan respects your firmest daily requirement rather than averaging all your preferences together.
| Change to explore | Forehead choice | Tying-back boundary | Tool commitment to discuss |
|---|---|---|---|
| Longer cheek-side pieces | Mostly visible forehead | Keep chosen sides long enough to secure | Natural fall, with any desired bend explained separately |
| A defined front feature | Open centre or fuller coverage | Accept some front pieces staying loose, or plan clips | Ask whether the opening or edge needs directing after washing |
| Softer layers beyond the front | Forehead can stay as it is | Identify upper sections that must still reach the tie | Compare ordinary drying with a shaped finish |
| Strong upper-to-back contrast | Decide front coverage independently | Accept more separate shorter pieces only where wanted | Distinguish natural movement from added lift or waves |
If you cannot accept loose hair during work, that requirement should outweigh a reference with short temple pieces. If you enjoy arranging the front but rarely style the back, a focused front feature may make better use of your effort. The budget tells you where to concentrate the change, not how fashionable it should be.
Decide forehead coverage before shortening the sides
Compare three front details separately: the opening, the lowest point and the width of the shorter section. An open centre can show the forehead while longer sides curve towards the cheeks. Fuller coverage can create a more continuous front line. A lightly separated edge offers another option, but visible gaps and a central opening are not the same thing.
L'Oréal Paris describes a curtain-style fringe as layered, usually centre-parted and face-framing. Its styling guidance includes using a round brush to direct the front upwards and away from the face. That distinction matters: the outward curve in a reference may partly be a blow-dried finish, rather than the natural position of the cut hair.2
When considering curtain bangs, look for the precise feature you want: a narrow opening above the brows, longer cheek-side pieces, or a stronger sweep. Then name what should remain unchanged. You can like the opening without asking for shorter layers through the crown, and like cheek framing without wanting hair across the central forehead.
Wear your everyday glasses while comparing the options. Decide whether you enjoy hair close to the frame or need the lenses clear when you look down. Use your own dry hair and normal parting as the reference. Facial proportions can guide visual preferences, but they do not oblige you to cover a forehead or create perfect symmetry.
A small cutting area can create a large everyday change. Judge the front by how it feels around your eyes and glasses, not only by how much total length stays.
Read visible layers from the side and back
For a broader change, locate the shortest upper piece first. Follow it towards the ear, then compare it with the longest back section. A gradual progression produces a different outline from clearly separate short pieces sitting over a long lower section. Check the same pattern in a side photograph; front portraits often conceal how pronounced that difference is.
If a wolf cut reference attracts you, decide which part of the contrast matters. It might be shorter movement around the top, a more obvious longer back, or both. You do not have to choose every feature at maximum strength. Leaving the forehead open is also a separate choice from shortening the upper layers.
Next, look at the lower edge against a plain background. Does it fall together, or can you see many separate ends? More hair can be shortened above a retained perimeter, so unchanged overall length does not necessarily preserve the same fullness. Sam Villa's tutorial explicitly isolates the perimeter when retaining length, reinforcing the value of discussing that edge as its own design boundary.1
Ask to compare these features rather than requesting “more texture” everywhere:
- The shortest upper endpoint and where it should sit when dry.
- The connection around the ears and how much coverage remains there.
- The longest back edge and how substantial you want it to look.
- The areas where distinct pieces are welcome, versus areas you prefer to fall together.
For ends that already look transparent, say whether a stronger lower line matters more than extra separation. For dense hair, identify where the fullness bothers you instead of asking for indiscriminate removal. A preference for lighter sides does not mean you want a lighter-looking back as well.

Let your usual tie-back style set a firm boundary
Gather your hair where you actually wear it: a low ponytail, a higher tie or a bun. Notice which front and upper pieces already escape. The distance each section must travel changes with the tie position, so “keep it long enough to tie” is too vague on its own. Demonstrate the movement before discussing new shorter sections.
Use clips to move existing strands aside while exploring coverage, but do not treat that as an exact preview of newly cut hair. Shorter pieces may fall differently. The practical question is whether you welcome loose detail near the cheeks, tolerate clips beside the ears, or need those areas clear without additional accessories. Those are different levels of acceptance.
Do not solve escaping layers by pulling the remaining hair increasingly tight. The American Academy of Dermatology warns that continuously worn pulling styles can cause tension and breakage.3 Keep comfort in the discussion: if a proposed outline makes your normal tie awkward, retain more length in the relevant sections or choose a less extensive change there.
Separate the cut from the tools behind the finish
If you mainly dry naturally
Bring a photograph after your ordinary drying routine, with your usual parting and no added curling. Observe the front and crown separately. One may have a bend while the other lies straighter. A layered cut establishes different lengths; it does not supply the soft waves, lifted roots or carefully separated ends that may appear in an inspiration image.
Choose a natural version you would still enjoy when the pieces are less arranged. Professional tutorials often show cutting and styling as separate stages; Sam Villa's example adds product, scrunching and diffusing after the cut to encourage movement.1 That does not make those steps compulsory. It helps you identify which photographed details are worth reproducing at home.
If you enjoy shaping with a brush
Identify one styling priority rather than promising an entirely new routine. You might be happy to direct the front away from the face, but not to curl every upper section. Ask for that specific step to be demonstrated. L'Oréal Paris notes that straight hair may need styling aids for the desired fringe shape and describes round-brush blow-drying as one approach.2
Keep the care cost in your tool budget too. The American Academy of Dermatology advises allowing partial air-drying before styling and reducing blow-drying frequency to help limit damage. It recommends flat irons on dry hair at low or medium heat.3 If the reference would make you reach repeatedly for hot tools, consider a looser finish you also like.
Choose the ordinary-day finish first. A more polished finish can remain an occasional option instead of becoming the condition for enjoying the haircut.
Compare two hypothetical change budgets
Imagine someone with long, mostly straight hair who likes the back, ties it away at work and is willing to shape only the front. A narrow front feature might concentrate the visible change where they want it. If loose strands are unacceptable, longer cheek-side pieces that can still be secured may be a better starting discussion than a short central fringe.
Now imagine someone with natural waves who wears the hair loose, enjoys distinct upper pieces and is comfortable with a softer lower edge. A broader layered change may match those preferences better. They should still check the shortest dry upper endpoint and side coverage. Liking waves does not automatically mean liking every short section in a highly contrasted reference.
These are design scenarios, not reported client results. Notice that the first person accepts more attention in a small area, while the second accepts a larger silhouette change. Neither has a universally smaller budget. Their limits concern different things. The useful choice is the one that preserves the daily habit each person values most.
Bring evidence that turns your budget into a cutting brief
A good reference set explains both the desired outline and the starting hair. Avoid collecting many almost identical front portraits. One clear front view, a side or rear view and a photo of your own ordinarily dried hair can reveal more. Label the feature you like, and include one boundary you do not want crossed.
| Bring or demonstrate | What it helps explain | Useful wording |
|---|---|---|
| An unstyled front photograph | Parting, current coverage and natural direction | “This is where the front sits after normal drying.” |
| A side and back reference | Upper-to-back contrast and lower-edge fullness | “I like these upper pieces, but want a fuller bottom line.” |
| Your usual tie and glasses | Pieces that must secure or stay clear | “These sides need to tuck; the cheek pieces can stay loose.” |
| A brief styling and treatment history | Tools used and differences through the lengths | “I shape the front only; these ends were previously bleached.” |
Mention previous colouring, bleaching, perming and straightening, including home applications, when discussing the condition of the lengths. If you are also considering chemical work, that history affects the service assessment. A cut changes shape; it should not be presented as creating a perm effect or restoring processed hair to an untreated state. Conditioning is a cosmetic care choice, not a substitute for those decisions.
For a discussion with a hair stylist, lead with the change you want and the hair you need to keep. Vit So's service information distinguishes cutting from colour, texture and care enquiries. A front-focused design request does not itself establish a separate fringe-only booking or charge, so ask which appointment scope fits the agreed work.
Before cutting, point to the shortest acceptable dry front and upper lengths. Restate the side pieces that must stay secure and the fullness you want at the back. Finish with the routine you will actually repeat. “Keep these sides for my low tie; change the front opening; leave the upper layers longer” is a useful brief because each part can be discussed visibly.
Questions & answers
Can I try the look with temporary styling before cutting?
A changed parting, loosely pinned front or temporary bend can help you compare forehead coverage and direction. It cannot reproduce the behaviour of shorter lengths exactly. Use the experiment to identify what you enjoy seeing, then discuss the actual dry endpoints separately.
Does fuller forehead coverage require a heavy fringe?
Not necessarily. Coverage, section width and visible strand separation are different choices. A softer edge can still cover much of the forehead, while a dense section can open through the centre. Compare the outline and the gaps you like rather than treating thickness as the only decision.
Can I add noticeable layers without shortening the longest back edge?
Sometimes, but retained length and retained fullness are separate aims. Shortening hair above the edge may leave fewer strands reaching it. Ask for the current perimeter to be assessed and explain whether keeping a substantial bottom line matters more than making the upper pieces dramatic.
What if I alternate between natural waves and straightened hair?
Bring photographs of both finishes and say which you wear most often. The shortest pieces can land differently when the bends are stretched out. Choose acceptable lengths in both versions, and explain the tools you use rather than designing solely around an occasional straightened finish.
Which lengths matter if I later want a smoother outline again?
Focus on the shortest front and upper pieces, not only the long back. Those shorter areas need to become longer to reduce contrast. Tell the stylist which sections you want to retain during future trims; repeatedly shortening the entire perimeter may not address the transition you have in mind.
Put the next step into practice
Develop your understanding of shape, cutting and styling with structured learning at Canvas. Hair styling courses in Hong Kong。
Explore practical guides for a clearer plan before your next style change. Canvas hair and beauty journal。
Tell the team which cutting or styling skills you would like to learn. Contact Canvas Academy。
Sources & further reading
- Kaitlyn Shaglet Haircut — Face-Framing Midlength Layers
Professional cutting education separates fringe, face frame, upper layers and a protected perimeter, then demonstrates styling as a distinct stage. Useful for discussing retained length and the difference between structure and arranged texture.
- Try the Trend: Curtain Bangs
Describes a usually centre-parted, layered front shape and explains round-brush styling, including why straight hair may need styling aids for the desired curve. Useful for separating forehead coverage from a photographed blow-dried finish.
- Hair styling without damage
Dermatologists advise partial air-drying, less frequent blow-drying and flat irons on dry hair at low or medium heat. The guidance also explains tension from continuously worn pulling styles, helping readers weigh tool use and comfortable tying-back habits.